Visit Main Site
Video Tutorials
Login

Popular Search

do docu ss doc document sss

     
Getting Started
Building a Website for Free
Signing Up for an Account
Website Editor
Sections
Snippet
Elements
Navigation
Header & Footer
Managing Columns
Switching Your Site Template
Publishing Your Site
Using Editor Menus
Online Store
Creating a Product
Creating a Product Category
Managing Product Variation
Create Customer
Creating a Customer Group
Creating an Order
Manage Your Orders
Payment Gateways Setup
Configure Shipping
Website Management
Create Pages
Configure Page SEO
Create Blog
Create Blog Category
Settings
Site Settings
Payment Gateways
Shipping and Handling
Page Settings
Category Page
Checkout
Product Page
Shopping Cart
Search
Animation & Effects Settings
SEO Configuration
Text Personalisation
WebCommander Marketplace
Purchasing Templates
Purchasing Plugins
Partner Program
Getting Started
Dashboard
Plugins
Templates
Websites
Payout
Report
Profile
Version History
Ratings and Reviews

Signing Up for an Account

WebCommander is awesome because it doesn’t cost anything to try. You can make a whole website without paying a dime.

Once your site is ready, you can decide whether to upgrade for some extra cool features. It’s all up to you!

Signing Up for a Webcommander Account

  • Navigate to the WebCommander website.
  • On the WebCommander homepage, locate and click the “Try Free” button.
  • You will be prompted to register with your email address. Provide the required information in the registration form.
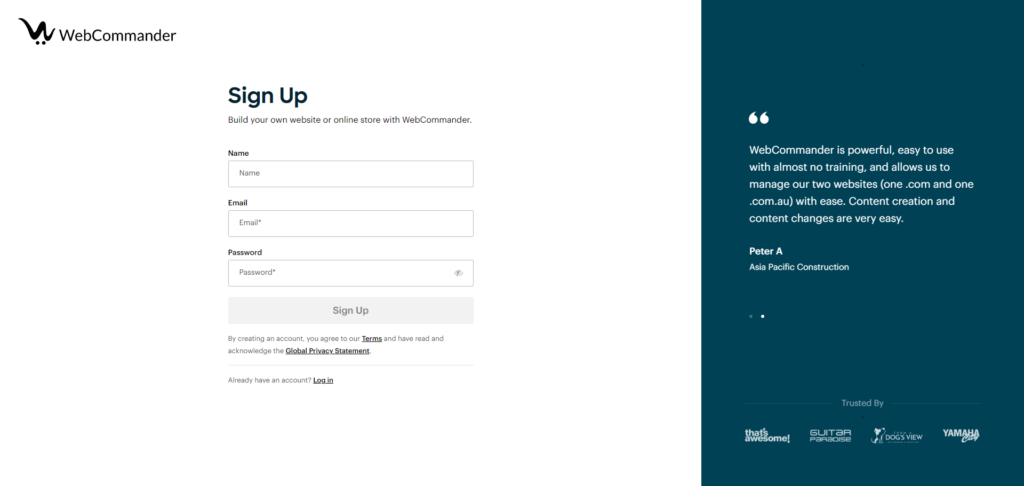
  • After entering your email address, click the “Sign Up” button.
  • Congratulations! You have successfully signed up for a WebCommander account.
  • After clicking the “Sign Up” button, you will be directed to the configuration page.
  • To begin, click on the “Let’s Start” button.
  • On the next screen, you’ll be prompted to choose the type of website you want:
    • If you want an eCommerce site, select “Yes, I want to sell online.”
    • If you prefer a content site, select “No, I don’t want to sell online” and click “Next.”
  • Click “Next” after making your selection.
  • Insert your business details as required and click “Next.”
  • Select your country from the provided options.
  • Now, you have the option to choose a template for your website.
    • If you have a specific template in mind, select it.
    • Alternatively, you can skip this step, and the default template will be installed for you.
  • Click “Next” to proceed.

Congratulations! Your WebCommander account is configured, and your website is ready for further customisation.

Can't find your answers? Contact Us

Need Personal Assistance?

Can't find what you're looking for? Our support team is ready to help you solve any challenge.

Contact us
Footer Logo

contact@webcommander.com1300 797 571

WebCommander
About Us
Features
Pricing
Compare
Partners
Contact Us
Resource
Find a Partner
Developers
Community
Blog
Solutions
Inventory Management
Omnichannel Sales
Ecommerce Automation
B2B / Wholesale
Headless Commerce
Website Design and Performance
Terms and Conditions
Privacy Policy
goToTop

©2024 WebCommander. All rights reserved.