Product Variation
Product Variation allows you to define different options for a single product, such as color or size. These variations help customers easily select the right version of a product while improving inventory management and product organization.
Accessing Product Variation Settings
- Login to your WebCommander account.
- From the left menu, go to Products.
- Click on the Product Variation tab at the top.
Adding a Product Variation
To create a new product variation:
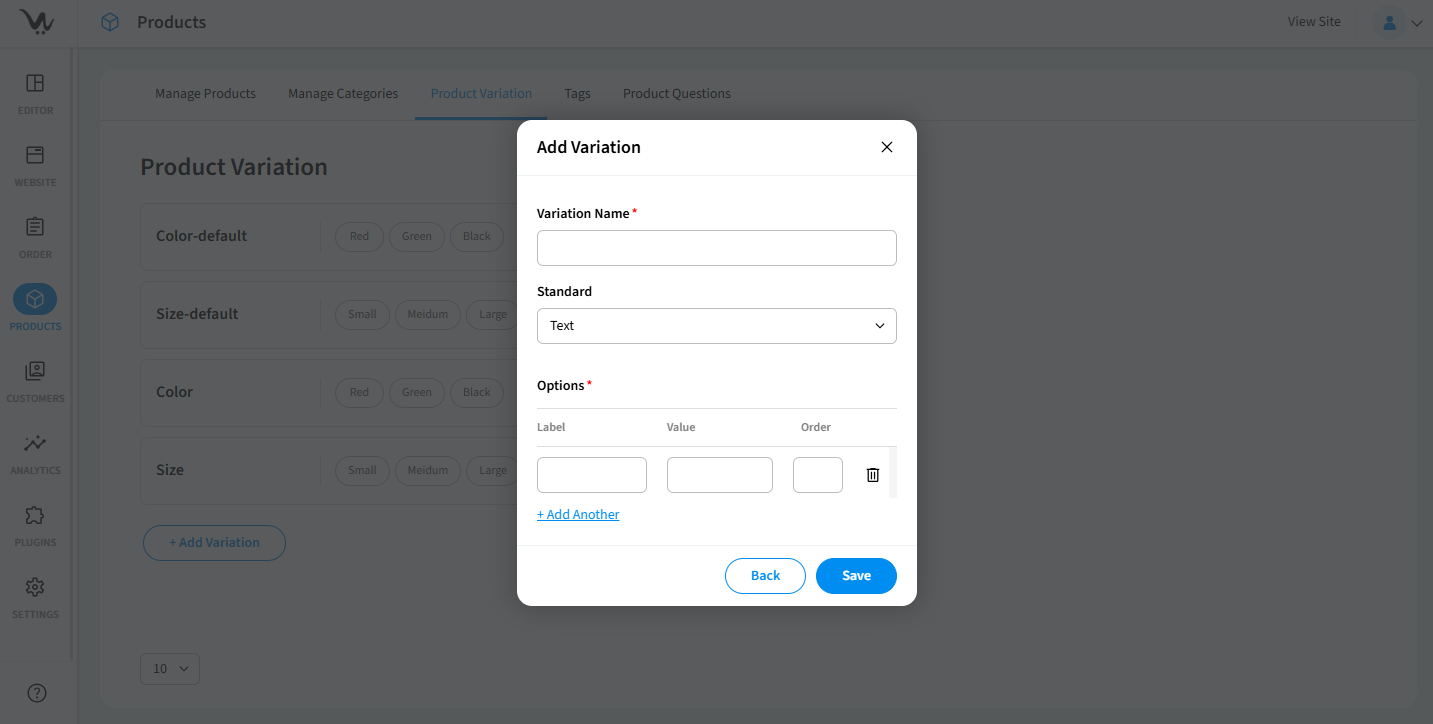
- Click the + Add Variation button.
- In the Add Variation popup:
- Variation Name: Enter the name for the variation (e.g., Color, Size).
- Standard: Choose the input type (Text, Color, Image, etc.).
- Under Options, fill in:
- Label: The display name (e.g., Red, Small).
- Value: Used internally for logic or filters.
- Order: Set the sequence in which options will appear.
- Click + Add Another to add more options under the same variation.
Managing Variations
Once variations are added, you can:
.png)
- Edit: Use the pencil icon to modify an existing variation.
- Delete: Click the trash icon to remove a variation.
- Default vs Custom: You may see pre-filled entries like “Color-default” and “Size-default.” These can be customized as needed.
Troubleshooting
- Ensure all required fields like Variation Name and Options are filled in, avoid special characters.
- Confirm the variation is saved and assigned to a product; clear cache if needed.
- Use the "Order" field to manually set display order (e.g., 1, 2, 3).
- Use unique names for each variation to avoid conflicts.
- Refresh the page, confirm the variation is not assigned to any active product when deleting a variation.